
Wiring Your Projects Right: Hot Tubs, Remodels, Outlets & Inspections
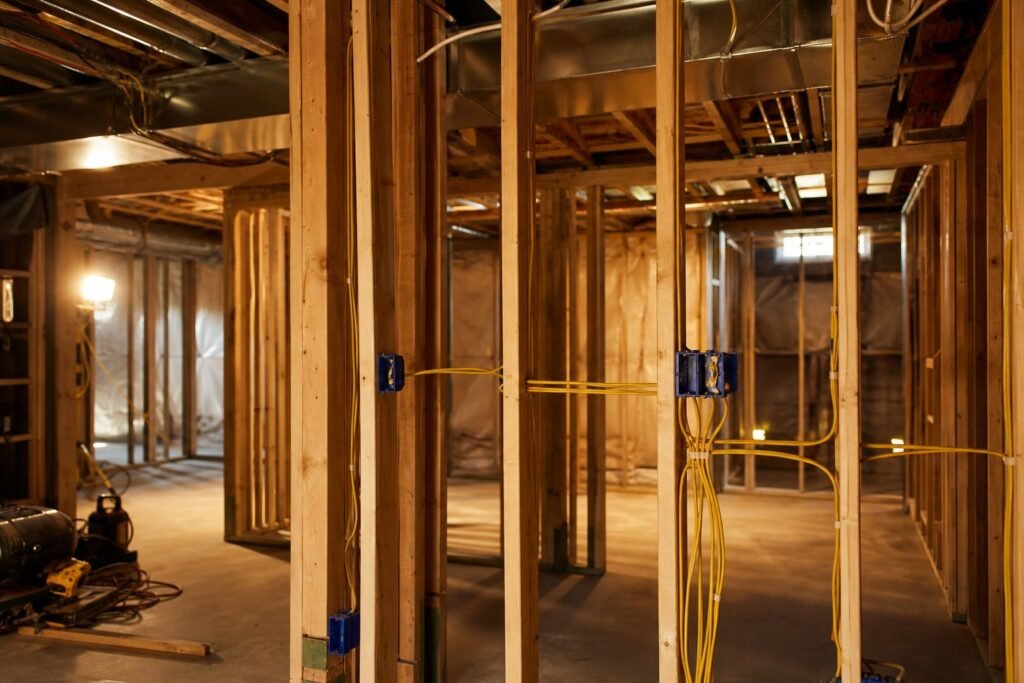
A hot tub circuit, a basement finish, a kitchen remodel, and a wall that needs more outlets all run on the same rails: confirm the panel can carry the new load, pull the city permit, rough in the wiring, pass inspection, then trim out the finished work. Get those five steps in order and a wiring project stays pleasantly boring. This guide walks each project the way it actually goes on the Wasatch Front, including what code requires and where your money is well spent versus wasted.
In this guide
- Where wiring projects go wrong
- Hot tub wiring, in brief
- The Utah basement finish
- Kitchen remodel circuits
- Which appliances need dedicated circuits
- Where code requires GFCI
- Adding outlets in finished walls
- Basement-finish permits in Utah
- The rough-in to finish sequence
- What inspectors actually check
- Electrical evaluations before you buy
- What you can honestly DIY
- Quick answers
Where do wiring projects actually go wrong?
Almost never at the craftsmanship stage. The wiring projects that turn painful in Weber and Davis County homes fail in one of three places: capacity that was never checked, permits that were never pulled, or steps done out of order. A beautifully run circuit landed in a panel with no room for it is still a problem, and a flawless basement finish with no inspection record is still a liability the day the house lists.
Capacity comes first because it decides everything downstream. A modern 200-amp service absorbs a spa or a finished basement without drama. A 100-amp panel in a 1960s bench neighborhood or a 1970s Roy split-level may not, and discovering that after the tub is on the pad is the expensive version of the lesson. Our electrical panel upgrade guide covers that arithmetic in full; the short version is that every project below begins with a load calculation, not a wire run.
The second failure is treating permits as optional paperwork, and the third is sequence: drywall hung before the rough-in inspection means drywall coming back down. None of this is complicated. It simply has to happen in order, and the rest of this guide shows what that order looks like for each project.
The cheapest wiring project is the one you only do once, in the right order.
What does hot tub wiring involve?
A full-size spa needs a dedicated 240-volt circuit, most commonly 50 amps, protected by a GFCI breaker, plus an outdoor disconnect mounted within sight of the water and a wire run that usually travels underground in conduit. The tub’s metal parts also get bonded, a safety step that ties every touchable surface to the same electrical potential and that casual installs routinely skip.
Placement drives the budget more than the tub does. A pad twenty feet from the panel is a short, friendly job; a pad across a finished yard and a concrete patio is a trenching project with a circuit attached. Typical installed pricing lands around $800–$2,500, and our breakdown of what hot tub wiring costs explains exactly what moves the number.
Utah adds one twist worth planning for: winter. Spas here run hardest in January, when the heater fights single-digit nights, so the circuit and its components get sized and rated for continuous cold-weather duty, and the disconnect gets mounted where you can reach it over snow rather than behind a drift line. It is a small planning detail at install time and a large quality-of-life detail every winter afterward.
The full requirements, breaker sizing, disconnect placement rules, burial depth, and the bonding step most write-ups gloss over, are in our hot tub electrical requirements deep dive. When you’re ready for a real quote, our hot tub electrical service is the direct line.
What does a Utah basement finish need electrically?
New circuits, almost always. Builders along the Wasatch Front have handed over unfinished basements for decades, and what’s typically down there is a keyless bulb on the stair circuit and one lonely receptacle. Turning that concrete box into bedrooms, a family room, and a bathroom means general lighting and receptacle circuits on code spacing, AFCI protection for the living areas, GFCI where water shows up, and often dedicated circuits for a theater setup, a freezer, or gym equipment.
Basement finishes are also where lighting design earns its keep, because you’re working under joists with limited headroom and zero natural light in most rooms. Recessed fixtures do the heavy lifting; our home lighting upgrade guide covers how to layer light so the space feels like the upstairs rather than a bunker.
Timing matters more here than in any other project in this guide, because basements get finished in phases in real life. Wiring the whole floor plan during one rough-in, even if the bathroom or the second bedroom stays unfinished until next year, costs a fraction of remobilizing later, and the inspection can cover it in one pass.
The room-by-room walkthrough, including permits, egress lighting, and the two-inspection rhythm, lives in our Utah basement finish electrical guide. On the service side, our remodel and renovation electrical team handles the wiring whether you’re running the project yourself or working through a finish contractor.
Which circuits does a kitchen remodel require?
Modern code asks a lot of a kitchen, and that’s largely the point of remodeling one. Countertop receptacles must be served by at least two 20-amp small-appliance circuits dedicated to the kitchen and dining areas, so the toaster oven and the air fryer stop negotiating over a single breaker every morning.
Beyond that countertop pair, the fixed appliances each expect their own circuit: dishwasher, disposal, and microwave at minimum, with the refrigerator strongly preferred on its own as well. An electric range or wall oven takes a 240-volt circuit sized to its nameplate, typically 40 or 50 amps. Add under-cabinet lighting, a hood, and maybe a pot filler’s instant hot tap, and a full remodel commonly lands somewhere between six and ten new or reworked circuits.
Kitchen lighting deserves its own line in the plan while the ceiling is open. Layered light, recessed fixtures for the room, pendants over the island, under-cabinet strips for the surfaces you actually chop on, changes how the space works, and islands bring their own receptacle rules along with the pendants. The remodel is when this costs least; retrofitting a single pendant later can exceed what three would have cost mid-project.
Older Ogden kitchens, especially in Avenues-era houses, often run the whole room on one 15-amp circuit, which is exactly why the coffee maker and the microwave cannot coexist there. A remodel is the one moment the walls are open and the fix is cheap relative to the cabinetry going in around it. Our remodel electrical service is built to slot into a kitchen schedule between demo and drywall without holding either up.
Which appliances need a dedicated circuit?
Anything motor-driven, heat-producing, or critical gets its own breaker. A dedicated circuit serves one appliance only, so a fault or an overload takes down that appliance alone instead of half the room, and the appliance never browns out because a vacuum started somewhere on the same line.
| Appliance | Typical circuit | Why it gets its own |
|---|---|---|
| Refrigerator | 15–20A, 120V | A tripped shared breaker means spoiled food |
| Dishwasher | 15–20A, 120V | Motor plus heating element |
| Microwave | 20A, 120V | Heavy draw in short bursts |
| Garbage disposal | 15–20A, 120V | Motor start-up surge |
| Electric range or oven | 40–50A, 240V | Sustained high heat load |
| Electric dryer | 30A, 240V | Heat and motor together |
| Central AC or heat pump | 20–40A, 240V | Compressor inrush current |
| Hot tub | 50A, 240V typical | GFCI-protected outdoor run |
| Chest freezer | 20A, 120V | Critical load, often in garage GFCI territory |
| Home theater or gym gear | 20A, 120V | Clean power, no nuisance trips mid-movie |
Your panel usually announces which appliances are begging for separation: if running two particular things together trips a breaker on a reliable schedule, the circuit is casting a vote. The fix is rarely a bigger breaker, which just moves the risk into the wire; it’s a second circuit, and during any remodel that circuit is cheap to add.
Where does code require GFCI protection?
Everywhere water and electricity can plausibly meet. A ground-fault circuit interrupter watches for current leaking out of the circuit, through a person standing in a puddle, for instance, and cuts power in a fraction of a second, far faster than a standard breaker would react.
- Kitchens: every receptacle serving the countertop
- Bathrooms: all receptacles, no exceptions
- Garages: including the freezer’s outlet, like it or not
- Outdoors: every receptacle, including the one behind the shrubs
- Basements: unfinished areas always, and recent code cycles extend it further
- Laundry areas and within six feet of any sink
Two honest notes. First, protection can live at the breaker or at the first receptacle in the chain, so one device often covers several outlets downstream; you don’t need a test-button face in every hole in the wall. Second, GFCI and AFCI are different animals: GFCI protects people from shock, AFCI protects the structure from arc-caused fires, and modern finished living spaces increasingly require both on the same circuit.
Housing era predicts what you will find. Homes built before the mid-1970s often have no ground-fault protection anywhere; 1980s and 1990s builds usually cover bathrooms and perhaps the garage; and each code cycle since has widened the net. Bringing an older home’s wet locations up to current protection is one of the highest-value small jobs in this entire guide, usually a single visit, and it never requires opening a wall.
Quick test: Press the TEST button on every GFCI in the house twice a year. If it doesn’t click and kill the outlet, or refuses to reset, the device has quietly retired and needs replacing. They wear out more often than people think.
Can you add outlets in finished walls without wrecking them?
Usually, yes. The technique is called fishing: an old-work box is cut into the drywall exactly where the new outlet will live, and cable is pulled, fished, from an attic, a crawl space, an unfinished basement, or an existing box through the stud bays without opening the wall. Done well, the only drywall touched is the rectangle the outlet itself occupies.
Northern Utah’s housing stock is friendly to this. Homes with unfinished basements or accessible attics offer a clean vertical path into almost any wall. The stubborn cases are two-story interior walls with fire blocking, exterior walls packed with insulation, and finished ceilings between floors; those sometimes need one or two small, patchable openings, and you deserve a straight answer about that before anyone cuts, not after.
The count matters less than the circuit behind it. Adding three receptacles to a bedroom circuit that’s already loaded to its edge relocates the problem instead of solving it, so the first question is always what the new outlets will feed and which circuit can honestly host them. Our outlet and switch installation service covers new locations, and the dead and half-hot outlets you already have while we’re there.
The requests track modern life: a pair of receptacles behind the wall-mounted TV so the cords disappear, bedside outlets with USB where a 1955 floor plan assumed one lamp, a workbench row in the garage, an exterior outlet under the eaves for holiday lights. Each is a fishing job of different difficulty, and pricing them as a batch runs meaningfully cheaper than four separate visits, because setup and drive time happen once.

Do you need a permit to finish a basement in Utah?
Yes. A basement finish adds new circuits, and new circuits are permitted, inspected work in Utah cities. The electrical permit typically rides alongside the building permit for the finish itself, with a rough-in inspection before insulation and drywall and a final inspection at the end.
Utah is friendlier to homeowners here than most people expect: on a home you own and occupy, you can generally pull your own permit and perform your own electrical work, provided it passes the same inspections a contractor’s work would. Plenty of our basement clients frame and hang drywall themselves and bring us in for the wiring; the permit doesn’t care who swings the hammer, only that the work inspects clean.
Skipping the permit is the false economy in this whole guide. Unpermitted finishes surface at appraisal, at sale, and in insurance conversations after something goes wrong, and retroactive permitting means opening walls you already paid to close.
Resale reality: County records showing an unfinished basement while the listing photos show a theater room is a question every buyer’s agent knows to ask. The permit costs a fraction of the price reduction that conversation produces.
How does a wiring project run, start to finish?
Every project in this guide follows the same skeleton, scaled up or down:
- Load calculation. Confirm the panel has capacity for the new circuits, or plan the subpanel or service upgrade first.
- Permit. Filed with your city before wire is pulled, not after.
- Rough-in. Boxes mounted, cable run and stapled, panel work prepped. No devices, no cover plates yet.
- Rough-in inspection. The inspector sees every connection and cable path before walls hide them.
- Close the walls. Insulation and drywall only after the rough-in passes.
- Trim-out. Devices, fixtures, plates, and breakers installed and labeled.
- Final inspection. Protection devices tested, the permit closes, and the record follows the house.
The sequence exists to protect the two places mistakes hide: inside walls and inside the panel. It also explains the scheduling rhythm of a remodel, because the electrician shows up twice, early and late, with drywall and paint in between. Build that into the calendar and nothing stalls; ignore it and the whole job waits on an inspection that could have been booked weeks earlier.
What does an electrical inspection checklist cover?
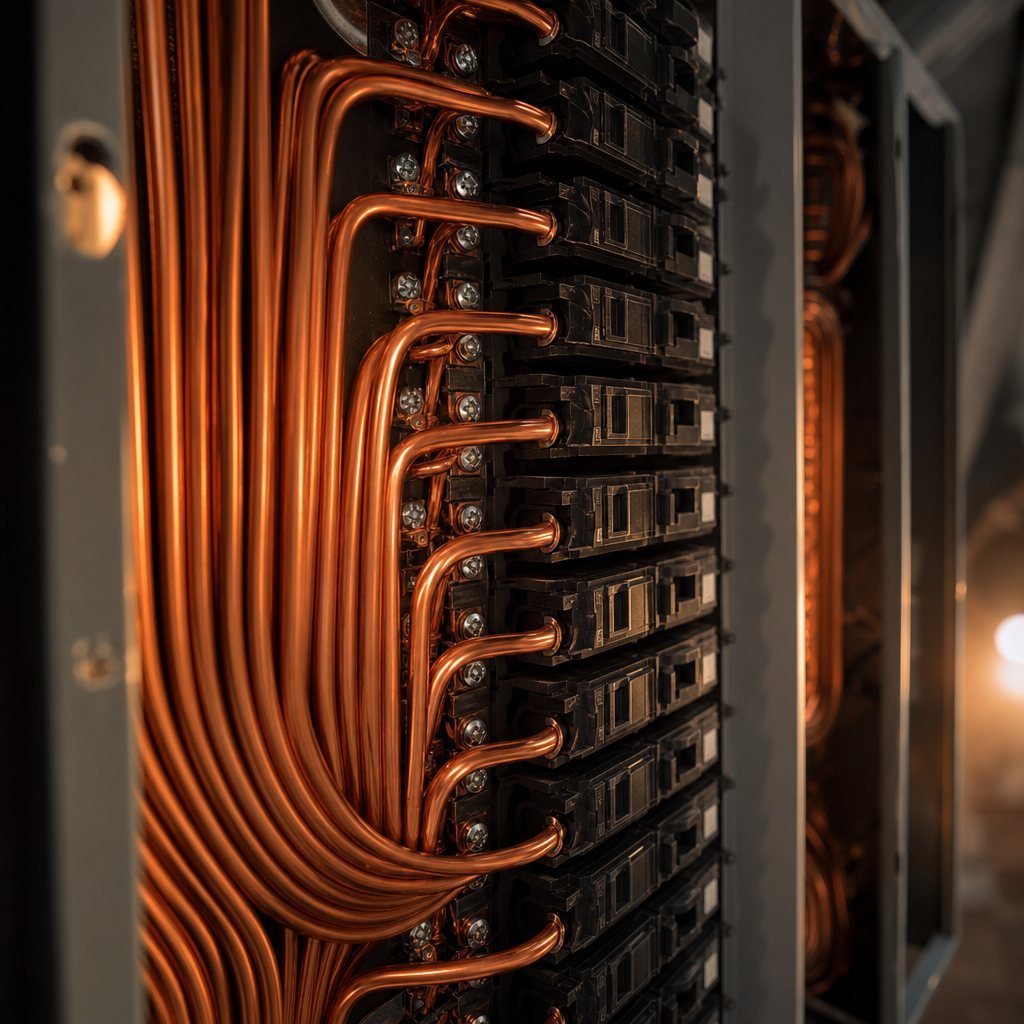
At rough-in, the inspector is verifying the things nobody will ever see again: wire gauge matched to breaker size, cables stapled within the required distances and protected by nail plates where they pass close to stud faces, box fill within limits, grounds made up, and circuits routed the way the permit describes. It’s a punch list, not a judgment; small corrections at this stage cost minutes.
At final, the attention shifts to what a family will live with: GFCI and AFCI protection present where required and actually functioning when tested, receptacle spacing that meets code, smoke and carbon monoxide alarm requirements satisfied for the areas touched, the panel directory filled out honestly, and covers on everything.
Knowing the checklist in advance is most of the game. Work wired to the checklist passes on the first visit, and first-visit passes are what keep a project on schedule, because re-inspections wait in the same queue as everyone else’s new work.
If you are acting as your own general contractor, treat the inspector as a resource rather than an adversary. Utah city inspection offices will generally tell you what they expect to see before you build it, a five-minute phone call that removes most of the suspense. What they will not do is design the job for you, which is where a licensed electrician on the scope earns the fee twice.
Should you get an electrical evaluation before buying a home?
On anything more than about 25 years old, yes, and on a few specific vintages, emphatically. A general home inspector gives the electrical system minutes and a visual once-over. A dedicated evaluation opens the panel, checks its brand and era against documented problem equipment like Zinsco and Federal Pacific, samples receptacles for grounding and polarity, looks for the aluminum branch wiring that showed up in 1970s builds, and prices whatever it finds.
The point is not to kill the deal. It’s to convert unknowns into numbers you can negotiate with: a panel near the end of its life is a $1,500–$3,000 line item, not a mystery, and a seller credit is much easier to get before closing than after. Our electrical inspections service does exactly this, and we schedule around due-diligence windows because we know how short they run.
The same evaluation makes sense at the start of a big project on a house you already own. Before a basement finish or a kitchen remodel, an hour of inspection tells you whether the panel, grounding, and service are ready to carry what you’re about to build on top of them.
Which wiring projects can you honestly DIY?
More than an electrician selling fear would admit, and less than the videos suggest. Like-for-like swaps sit comfortably within reach of a careful homeowner: a worn receptacle, a standard switch, a new light fixture on an existing box, all with the breaker off and a voltage tester proving it.
Utah even lets an owner-occupant wire under their own permit, and some do it well. The practical line isn’t legality, it’s consequence: work inside the panel, 240-volt circuits, GFCI and AFCI coordination, and anything buried or bonded can be wrong in ways that stay invisible until the day they matter. If you wouldn’t know how to test what you built, that’s the signal to hand it off.
Where DIY genuinely saves money on our jobs: dig your own trench, cut and patch your own drywall, do your own demo, and have the work area clear when we arrive. Utah electricians typically bill $85–$150 an hour, so every hour of non-electrical labor you take off the ticket is real savings, and we’ll happily tell you which hours those are.
Quick answers
Do I need a permit to add a single outlet?
If it extends a circuit with new wiring, most Utah jurisdictions say yes. Swapping an existing device like-for-like does not require one. In practice the permit question gets answered inside any quote we write, so it never becomes a surprise line item or a resale problem later.
Can a 100-amp panel handle a hot tub or a basement finish?
Sometimes. It depends on what already lives on the service: a gas-appliance home with modest loads may have room for a 50-amp spa circuit, while an all-electric home is likely already close to the ceiling. A load calculation settles it in under an hour, and it should happen before any equipment is purchased.
What fails electrical inspections most often?
Small, preventable things: missing nail plates where cable passes near stud edges, overfilled boxes, missing GFCI or AFCI protection, unsecured cable, and blank or dishonest panel directories. None are expensive to fix at rough-in. All are expensive to fix after drywall.
Does a remodel force the whole house up to current code?
No. The general rule is that what you touch must meet current code while what you leave alone can remain as built. A kitchen remodel means a code-compliant kitchen, not a whole-house rewire, though inspectors can flag genuine hazards they see along the way.
How long does the electrical part of a basement finish take?
Rough-in for a typical finish runs a few days of on-site work and trim-out another day or two. The calendar is dominated by inspection scheduling and the other trades, not by the wiring itself, which is why booking inspections early keeps the whole project moving.
Is a pre-purchase electrical evaluation worth it on a newer home?
Under about fifteen years old, usually not, unless the home was a flip or shows signs of DIY wiring, which are exactly the houses where an hour of evaluation pays for itself many times over. On older stock, especially anything with its original panel, it is some of the cheapest insurance in the transaction.
Do wiring projects add appraisal value or just convenience?
Both, unevenly. A finished, permitted basement adds appraisable square footage, the clearest value gain in this guide. Kitchen circuits, added outlets, and a spa circuit read as condition and convenience rather than line items, but unpermitted or visibly amateur wiring subtracts real money fast. The honest frame: permits protect value, and good wiring buys livability.
Can I buy my own fixtures and devices for you to install?
Yes, and for decorative fixtures we encourage it, since you know your taste. For devices that do protection work, GFCI receptacles, AFCI breakers, dimmers matched to LED loads, let us spec them, because the difference between builder-grade and spec-grade hardware is where callbacks come from.
Planning a spa pad, a basement, a kitchen, or just more outlets where life actually happens? One walkthrough gets you a straight scope, a real number, and zero pressure.
From the Avenues to the East Bench, wiring projects in Ogden come with era-specific quirks, and we’ve worked in most of them. Our Ogden electrician page covers how we approach the city’s housing stock, permit office and all.